How to Quickly and Easily Empty Your Shark Robot Vacuum?
:max_bytes(150000):strip_icc()/RSP_23_yeediVacStationRobotVacuumandMopSelf-Emptying3in1_HW_2929-2.jpg-b55d9e1428c940e59984e338d1330eb3.jpg)
To empty a shark robot vacuum, remove the dustbin and dispose of any debris. Then, snap the dustbin back into place.
Shark robot vacuums are a convenient and efficient way to keep your home clean without lifting a finger. It’s essential to know how to empty them properly to avoid any damages or malfunctions. It’s a simple process that requires you to remove the dustbin, dispose of any debris collected and snap it back into place.
We’ll take a closer look at the steps involved in emptying a shark robot vacuum to help you maintain your vacuum effectively. So, stay tuned to learn more.
Identify When Your Shark Robot Vacuum Needs To Be Emptied
Signs That Your Shark Robot Vacuum Needs To Be Emptied
Have you ever had a shark robot vacuum that wasn’t cleaning effectively? The solution could be quite simple: emptying the dust cup.
Below are some warning signs that indicate it’s time to empty your shark robot vacuum:
- The vacuum seems to be pushing dust around instead of picking it up.
- You’ve noticed a decrease in suction power.
- The dustbin is full, and debris is overflowing from the vacuum.
- The vacuum’s status light is blinking red.
- The vacuum is leaving debris behind on the floor.
Steps To Empty A Shark Robot Vacuum
After identifying that the vacuum needs to be emptied, follow these easy steps to remove the dust cup and empty its contents:
- Locate the dust cup at the back of the vacuum.
- Ensure that the shark robot vacuum is switched off before attempting to remove the dust cup.
- Press the dust cup release button on the top of the vacuum and pull the dust cup away from the rest of the machine.
- Hold the dustbin over a garbage can and press the dust cup release button again to open the bottom lid.
- Tap the bottom of the dust cup to loosen any dirt or debris that may be inside.
- Empty the dust cup’s contents into the garbage can.
- When finished, close the bottom lid of the dust cup.
- Align the dust cup back to its original position on the vacuum.
- Push the dust cup in until it snaps into place.
Now it’s time to switch the vacuum back on and watch it clean effectively once again. Remember to check the dust cup regularly to ensure the vacuum operates well.
Tools You Will Need
List Of Tools Required To Empty Your Shark Robot Vacuum
Emptying your shark robot vacuum regularly is essential to keep your robotic cleaner functioning at its best. Failing to empty the dustbin of your shark robot vacuum could damage its suction performance, leaving you exasperated, and you may even have to replace the filters more frequently.
You don’t need to be a tech guru to know that properly maintaining your shark robot vacuum increases its life span and improves its performance. Here is a list of the tools you will need to keep your shark robot vacuum in tip-top shape:
- A trash bin
- A dry soft cloth
- Rubber gloves (optional)
Trash Bin
You will need a trash bin to dispose of the waste from your shark robot vacuum. The large dustbin of the robot vacuum can store a lot of debris, so you will need a bin that is big enough to hold all the dirt without spilling over.
A large-sized trash bin will save you time and reduce the need for constant emptying.
Dry Soft Cloth
You will need a dry soft cloth to wipe off any dust that may have settled on the robot vacuum’s exterior after cleaning. Wiping your shark robot vacuum regularly with a dry cloth will help maintain its gloss and luster and keep it looking new.
Moreover, it eliminates the chances of dust accumulating on your robot vacuum, which can lead to blockages.
Rubber Gloves
Rubber gloves are optional. Though not mandatory, using rubber gloves while cleaning the shark robot vacuum prevents your hands from getting dirty. Plus, if you are allergic to dust or have sensitive skin, wearing rubber gloves will protect your hands from any unwanted irritation.
Regular maintenance of your shark robot vacuum is an indispensable part of keeping it functioning efficiently. By adhering to the above guidelines, you can ensure that your shark robot vacuum is always in top-notch condition, ready to tackle any cleaning task that comes its way.
Opening Your Shark Robot Vacuum
Step-By-Step Guide To Opening Your Shark Robot Vacuum
If you own a shark robot vacuum, there will come a time when you will need to empty the dustbin. Here is a step-by-step guide on how to do it:
- Place the shark robot vacuum on a flat surface – make sure the power button is in the off position.
- Locate the dustbin release button on the top of the shark robot vacuum. It is usually orange or grey in color.
- Press the button down and pull the dustbin out. Be careful not to spill any dirt or debris.
- Take the dustbin to a trash can and empty the debris. You may need to shake the bin a little to release any stuck debris.
- Once the dustbin is empty, you can use a soft brush to clean it. Avoid using harsh chemicals or water to clean the dustbin, as it may damage the robot.
- Before replacing the dustbin, remove the filter and clean it according to the manufacturer’s instructions.
- Once you have cleaned the dustbin and the filter, replace the filter and insert the dustbin back into the shark robot vacuum.
- Push the dustbin in until it clicks. You should hear a satisfying click when the dustbin is securely in place.
- Turn the power button back on, and your shark robot vacuum is ready to clean again!
By following these simple steps, you can keep your shark robot vacuum running smoothly and efficiently. Make sure to regularly empty the dustbin and clean the filter to get the best performance out of your vacuum.
Empting The Shark Robot Vacuum
How To Empty A Shark Robot Vacuum
Shark robot vacuums are an excellent way to keep your home clean, but it’s essential to know how to empty the vacuum when it’s full. Here is a step-by-step guide on how to empty the shark robot vacuum bin.
Step-By-Step Guide On How To Empty The Shark Robot Vacuum Bin
Shark robot vacuum has a dustbin that should be emptied after every cleaning cycle. Here’s how:
- Step 1: First, make sure that the vacuum is turned off.
- Step 2: Locate the dustbin, which is usually at the back of the robot vacuum.
- Step 3: Press the release button on the dustbin to release it from the robot vacuum.
- Step 4: Hold the dustbin over a trash can and press the release button again to open the lid.
- Step 5: Gently shake the dustbin until all the dirt and debris inside falls out.
- Step 6: Use a cleaning brush or cloth to remove any remaining dirt or debris from the dustbin.
- Step 7: Close the lid of the dustbin and reattach it to the robot vacuum.
Tips For Maintaining The Shark Robot Vacuum
Emptying the dustbin is only one part of maintaining your shark robot vacuum. Here are some tips to keep your shark robot vacuum in good condition:
- Clean the brushes regularly to prevent dirt and hair from accumulating around them.
- Remove any debris from the wheels if you notice that they’re not turning correctly.
- Replace the filters of the shark robot vacuum often to ensure that they’re working correctly.
By following this guide on how to empty the shark robot vacuum bin and taking care of your shark robot vacuum, you can keep your home clean and tidy all the time. Happy cleaning!
Cleaning Your Shark Robot Vacuum
It’s no secret that cleaning appliances are a significant convenience in our lives, and shark robot vacuums are undoubtedly one of them. They save time and effort in maintaining cleanliness and hygiene. However, it’s essential to clean and empty your shark robot vacuum regularly, or it’ll start losing its efficiency over time.
Therefore, let’s go through the essential guides on how to do a routine cleaning of your vacuum cleaner.
Safety First
As with any electrical device, make sure to unplug your shark robot vacuum before starting to clean. It’s vital to ensure your safety because any small mistake can lead to serious consequences.
Cleaning The Brush Roll And Filter
The brush roll and the filter are the two most crucial components that require routine cleaning. Here’s how to do it:
- Remove the brush roll from the vacuum and take off any hair, debris, or dust that got tangled over time.
- Clean the brush roll carefully, making sure not to damage it.
- Remove the filter by pulling it out from the vacuum.
- Wash the filter with water and let it dry completely before placing it back.
Emptying The Dustbin
Emptying the dustbin should occur after each vacuuming session to ensure that the vacuum cleaner is efficient for the next use. Here are the steps to do it properly:
- Locate the dustbin on the shark robot vacuum.
- Press the release button to unlock the dustbin.
- Hold the dustbin steady and empty it into the trash bin.
- Brush off any remaining dust or debris from the bin.
Cleaning The Sensors And Charging Contacts
The sensors and charging contacts are responsible for your shark vacuum’s smooth operations, so it’s vital to keep them clean. Here’s how you can clean them:
- Locate the sensors and charging contacts on the shark vacuum.
- Gently wipe them with a soft and dry cloth.
- Wipe the sensors and charging contacts with a small amount of rubbing alcohol to sterilize them.
Storage
Storing your shark robot vacuum the right way when not in use can extend its lifespan significantly. Here are some essential tips to consider when storing it:
- Find a cool and dry place to store your vacuum cleaner.
- Avoid direct sunlight and damp areas.
- Store all the attachments and accessories with the vacuum cleaner in a safe and secure place.
Regular cleaning of your shark robot vacuum is essential to maintain the highest level of performance and longevity. Make sure to follow these guidelines to keep your vacuum cleaner in tip-top shape, and it’ll keep your home clean and tidy for years to come.
Reassembling Your Shark Robot Vacuum
Shark robot vacuum is an efficient and modern way of cleaning your house. With the ability to avoid obstacles, it can navigate around your home in no time. However, it’s essential to understand how to clean and reassemble one of these devices.
In this section, we’ll be discussing how to reassemble your shark robot vacuum step-by-step.
Step-By-Step Guide To Reassemble Shark Robot Vacuum
Firstly, let’s take a look at some essential components you need to keep in mind when reassembling the shark robot vacuum.
- Make sure to clean all the parts thoroughly.
- Dry them before putting them back in their respective places.
- Do not forget to connect all the parts properly.
Following these steps ensures that everything will function correctly once the shark robot vacuum is reassembled. Now, let’s get started with the reassembly process.
Reattaching The Dustbin
The dustbin is a critical component of the vacuum as it is where all the dirt and debris collected by the shark robot vacuum are stored. Here’s how to reattach it.
- Place the dustbin back into the vacuum by sliding it into its appropriate slot.
- Make sure that it’s secure.
Reattaching The Filter And Brush
The filter and brush play a vital role in ensuring that the shark robot vacuum works efficiently. Here’s how to reattach them.
- Take the filter and snap it into place.
- Reattach the brush by sliding it back into the slot.
Reattaching The Side Brush
The side brush helps to clean the edges and corners of your home. Here’s how to reattach it.
- Take the side brush and attach it by clicking it into the slot provided.
Recharging The Battery
Once you have reassembled the shark robot vacuum, it’s crucial to ensure that the battery is sufficiently charged before putting it to use. Here’s how to recharge it.
- Place the vacuum on the charging dock and plug it in.
Reassembling a shark robot vacuum is not a complicated process. By following the steps mentioned above, you should have no issues in doing it yourself. Make sure to follow all the steps, and you’ll have a perfectly functioning shark robot vacuum in no time.
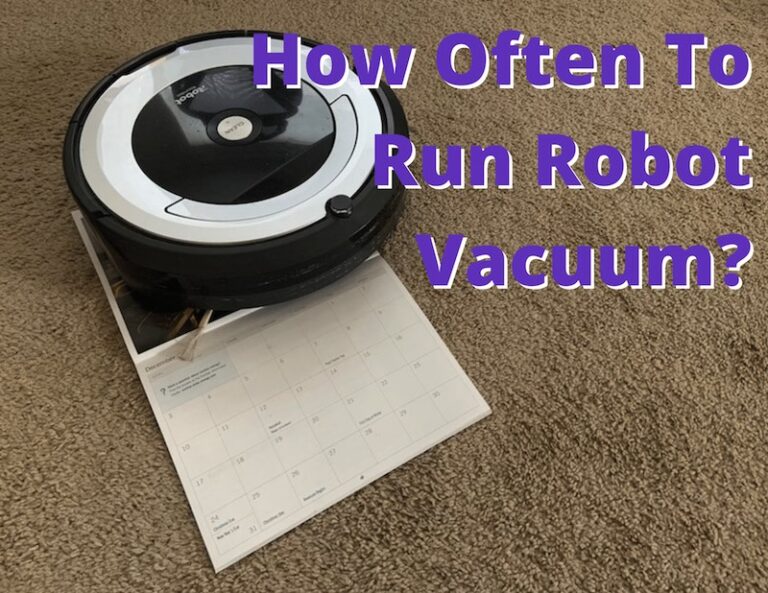
Know When To Empty Your Shark Robot Vacuum
Know When To Empty Your Shark Robot Vacuum.
Are you one of the many people who enjoy the convenience of having a shark robot vacuum clean your floors? One question many people ask is, how often should you empty your shark robot vacuum? Keeping an eye on when you need to empty it will ensure that your vacuum remains efficient and running smoothly.
How Often Should You Empty Your Shark Robot Vacuum?
It is recommended that you empty your shark robot vacuum after every use or at least once a week, depending on usage. Here are some key points to consider:
- Check the dirt bin often to ensure that it does not overflow and that your vacuum can capture all the dirt and debris.
- Empty the dustbin after every use to keep your vacuum’s performance top-notch.
- For heavy usage, it might be necessary to empty the dustbin multiple times per day to ensure that your vacuum runs smoothly.
Benefits Of Emptying Your Shark Robot Vacuum Regularly
Regularly emptying the dustbin of your shark robot vacuum can have several benefits, including:
- Preventing clogs and blockages that can impede your vacuum’s performance.
- Prolonging the life of your shark robot vacuum by preventing damage that can be caused by an overfull dustbin.
- Ensuring that your floors remain clean by capturing all the dirt and debris.
Tips For Emptying Your Shark Robot Vacuum
Here are some tips to help you when emptying your shark robot vacuum:
- Always make sure to turn off your vacuum before emptying the dustbin to avoid any accidents.
- Dispose of the debris properly and avoid dumping it back onto the floor.
- Clean the filters and dustbin regularly to prevent any odor buildup.
- Check the spinning brush for any hairs or fibers that might have been picked up during vacuuming.
By following these tips and emptying your shark robot vacuum regularly, you can ensure that it remains in top condition, providing you with outstanding cleaning power for years to come.
Empty Your Shark Robot Vacuum Bins After Every Use
Guides On How To Empty The Shark Robot Vacuum Bin After Every Use
Having a shark robot vacuum at home is a convenient way to keep your floors clean with minimal effort. However, it’s important to remember that emptying the vacuum’s bin is just as important as using it. A full bin can cause loss of suction, preventing the vacuum from cleaning effectively.
In this guide, we’ll take a look at how to empty the shark robot vacuum bin after every use.
Step By Step Guide
Here’s how to empty the shark robot vacuum bin after every use:
- Locate the dustbin release button on your shark robot vacuum. It’s usually located at the back, just above the dustbin.
- Press the release button and remove the dustbin from the vacuum. Hold the dustbin over the trash can.
- With your other hand, press the dustbin release button on the bottom of the bin to open the trap door.
- Gently shake the dustbin over the trash can to release all the dirt and debris.
- Once the dustbin is empty, close the trap door and reattach the dustbin to the vacuum.
Cleaning The Filters
In addition to emptying the bin after every use, it’s important to clean the filters on a regular basis. Clogged filters can significantly reduce the vacuum’s suction power, rendering it almost useless. Here’s how to clean the filters:
- Remove the filter cover from the dustbin.
- Take out the filters from the dustbin, being careful not to damage them.
- Rinse the filters with water. Be sure to use only water – no soap or cleaning solutions.
- Allow the filters to dry completely before reinserting them into the dustbin.
- Reattach the filter cover to the dustbin and reattach the dustbin to the vacuum.
Maintaining Your Shark Robot Vacuum
Regularly emptying the dustbin and cleaning the filters are just a few steps you can take to maintain your shark robot vacuum. Here are some additional tips:
- Replace the filters every 3 months or as needed.
- Clean the brushes and sensors once a month.
- Store the vacuum in a dry and cool place, away from direct sunlight.
- Check the vacuum regularly for any damages and replace any broken parts.
By following these simple steps, you’ll be able to keep your shark robot vacuum in good condition and ensure that it cleans your floors effectively and efficiently.
Clean Shark Robot Vacuum Filters Whenever Necessary
Guides On How To Clean The Shark Robot Vacuum Filters
Whether you’re a seasoned shark robot vacuum owner or you’ve just unboxed your new robotic helper, keeping your shark robot vacuum’s filters clean is essential for superior cleaning performance. A clean filter ensures that your vacuum sucks up dirt and debris more efficiently, resulting in clean floors every time.
In this section, we’ll be going over two types of filters you will find in the shark robot vacuum, and how to clean them:
Hepa Filter
The hepa filter in the shark robot vacuum captures small particles and allergens that are present in the air and on surfaces. For optimal performance, clean the hepa filter every two months or as needed. Here’s how you can do it:
- Turn off and unplug the vacuum
- Press the filter release tab located at the side of the dustbin, and pull out the filter tray.
- Remove the hepa filter from the tray.
- Tap the filter gently on the inside of a trash bin to remove the dust and pet hair stuck in it.
- Rinse the filter under running water until the water runs clear. Do not twist or wring the filter.
- Let the filter air-dry completely before placing it back in the vacuum.
Front Wheel Filter
The front wheel filter captures pet hair and surface debris that could get stuck in the front wheel of the vacuum. Clean this filter every 4-5 cleanings or when necessary. Here are the steps you can follow:
- Turn off and unplug the vacuum
- Locate the filter cover on the front side of the vacuum.
- Use a flathead screwdriver to carefully unscrew the cover.
- Remove the filter from the cover.
- Tap the filter gently on the inside of a trash bin to remove any debris stuck in it.
- Rinse the filter under running water until the water runs clear.
- Let the filter air dry completely before placing it back in the cover and re-screwing it.
Regularly maintaining clean filters will not only increase the suction power of your shark robot vacuum but also extend its lifespan. Happy cleaning!
Benefits Of A Well-Maintained Shark Robot Vacuum
Why It Is Crucial To Keep Your Shark Robot Vacuum Clean
An investment in a shark robot vacuum is an investment in your time and energy, as it will perform the task of vacuuming your floors for you. However, to ensure that your shark robot vacuum operates at optimal capacity, it is crucial to maintain it regularly.
Here are some reasons why keeping your shark robot vacuum clean is essential:
- A well-maintained shark robot vacuum ensures that it continues to clean efficiently and effectively. When the vacuum is dirty, its parts can become clogged, causing it to struggle and reducing its cleaning productivity.
- A shark robot vacuum with a dirty filter will circulate dust and allergens back into the air, defeating the purpose of vacuuming in the first place.
- By cleaning your shark robot vacuum regularly, you have a better chance of increasing its lifespan. Sending an unclean shark robot vacuum for servicing can be time-consuming and costly.
A well-maintained shark robot vacuum comes with a range of benefits that ensure your home remains clean, and your shark robot vacuum continues to function optimally.
- Quieter operation: When your shark robot vacuum is correctly maintained, it will operate more quietly than a dirty or clogged vacuum.
- Saves time and energy: A well-maintained shark robot vacuum saves you time and effort by cleaning each area thoroughly and quickly.
- Improved durability: When you regularly clean and maintain your shark robot vacuum, you improve its durability and lifespan. This saves you money and time in the long run.
- Better air quality: Filters play a crucial role in a shark robot vacuum’s function. By maintaining your shark robot vacuum and cleaning its filter regularly, you improve the quality of air in your home.
- Honored warranty: By maintaining your shark robot vacuum following the manufacturer’s guidelines, you safeguard the warranty. A poorly maintained vacuum can void the warranty, leading to expensive repairs or replacements.
Frequently Asked Questions On How To Empty A Shark Robot Vacuum
How Often Should I Empty The Shark Robot Vacuum?
It is recommended to empty the shark robot vacuum after every cleaning session to ensure optimal performance.
How Do I Know When To Empty The Shark Robot Vacuum?
The shark robot vacuum has sensors that indicate when the dustbin is full, and it will flash a red light to notify you.
Is It Safe To Empty The Shark Robot Vacuum?
Yes, it is safe to empty the shark robot vacuum. Simply remove the dustbin, empty it, and then reattach it to the vacuum.
What Should I Do If The Shark Robot Vacuum Is Not Emptying Properly?
If the shark robot vacuum is not emptying properly, make sure the dustbin is properly attached. You can also clean the dustbin and filter to ensure they are not clogged.
Can I Wash The Dustbin And Filter Of The Shark Robot Vacuum?
Yes, you can wash the dustbin and filter of the shark robot vacuum with mild soap and water, but be sure to let them dry completely before reattaching them.
Conclusion
Emptying your Shark Robot Vacuum doesn’t have to be a daunting task. With these simple steps, you can quickly and easily clear out the dust and dirt, keeping your vacuum running smoothly and your home clean. Following these guidelines and regularly maintaining your vacuum, you’ll enjoy a hassle-free cleaning experience.