How to Deep Clean Your Shark Robot Vacuum?
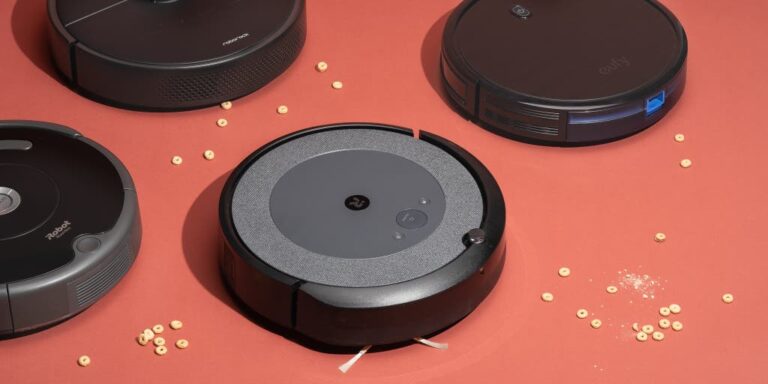
:max_bytes(150000):strip_icc()/5-best-robot-vacuums-for-carpets-of-2022-tout-6e631765b3b64f21a05e00ff96d55af2.jpg)
Credit: www.realsimple.com
To clean shark robot vacuum, first, remove the dustbin and filter, empty and clean them. Then, use a damp cloth to wipe down the vacuum’s exterior and sensors.
Shark robot vacuums are a fantastic way to keep floors clean with minimal effort. The vacuum easily sucks up debris, dirt and hair, keeping your home in tip-top shape. The robot vacuums have various features that ensure you can clean several types of surfaces.
These features include a self-cleaning brush roll, edge cleaning and dual-brushes. However, without cleaning and maintenance, a shark robot can’t perform effectively. Therefore, it’s crucial to learn how to clean and maintain the vacuum properly. In this article, we’ll go over all the steps necessary to keep your shark robot vacuum working well.
Step 1: Gather Supplies
Shark robot vacuum is a great home maintenance accessory that keeps your flooring clean without the hassle of manual cleaning. However, just like any other device, the shark robot vacuum requires regular cleaning to keep it functioning effectively. Deep cleaning your shark robot vacuum is a crucial aspect of vacuum maintenance, and it starts with gathering the necessary supplies.
List Of Supplies Needed To Deep Clean The Shark Robot Vacuum
Before you start cleaning your shark robot vacuum, it’s important to have all the necessary supplies prepared. Here’s a list of things you’ll need to deep clean the shark robot vacuum:
- Soft brush attachment
- Cleaning cloth
- Mild detergent or vinegar
- Scissors
- Compressed air canister
Description Of The Importance Of Each Supply In The Cleaning Process
- Soft brush attachment: This attachment is necessary to remove any dust or debris from the vacuum’s brushes. Its soft bristles help to avoid any damage to the brushes, making it safe to use without causing wear and tear.
- Cleaning cloth: The cleaning cloth is needed to wipe down the vacuum’s exterior and to clean any debris on the dustbin. It’s advisable to use a mild detergent or vinegar with the cleaning cloth to avoid any scratches on the vacuum’s surface.
- Mild detergent or vinegar: This is used with the cleaning cloth to remove any stubborn stains or dirt that may be stuck on the vacuum’s surface. Both of these cleaning agents are safe to use without causing any damage to the vacuum’s exterior.
- Scissors: When deep cleaning the shark robot vacuum, it’s important to cut any hair or debris that may be tangled around the vacuum’s brushes. Scissors are best for this job as they can be used to cut hair and debris with precision, without causing damage to the vacuum.
- Compressed air canister: This is the most important supply needed for cleaning the shark robot vacuum. The canister is used to blow compressed air into the vacuum and its brushes, removing any dust or debris accumulated. This process ensures the vacuum is dirt free and fully functional.
Step 2: Disassemble The Shark Robot Vacuum
Detailed Explanation Of How To Take Apart The Various Sections Of The Shark Robot Vacuum
Disassembling your shark robot vacuum is essential for proper cleaning and maintenance. Here’s a step-by-step guide on how to disassemble your robot vacuum:
- First, remove the dustbin from the shark robot vacuum by pressing the release button on the top of the bin.
- Turn the robot vacuum around and remove the main brushroll. Simply slide the brushroll out and clean it using a cleaning tool to remove any hair or debris stuck inside.
- Next, remove the side brush by pulling it out from the side of the robot vacuum.
- There are two filters in the robot vacuum – a foam and a felt filter. Remove them by pressing down on the filter frame’s release tab and removing them from the robot vacuum.
Importance Of Handling The Parts Carefully To Prevent Damage
It is essential to handle the parts of your shark robot vacuum with care to avoid damaging them. Here are a few precautions you should take while disassembling the parts:
- Make sure you have a clean and safe workspace before taking apart the shark robot vacuum.
- Always be gentle when removing and replacing parts. Avoid using excess force when taking them apart, as it could result in parts breaking or becoming damaged.
- Clean each disassembled part by gently wiping them down using a soft, damp cloth to prevent scratches, which could damage the parts’ surface.
- When re-assembling the parts, make sure they are securely attached and fit back in place correctly.
By disassembling your shark robot vacuum and cleaning its parts, you’ll increase its suction power, and it will work more effectively. Regular cleaning also extends the robot vacuum’s lifespan and keeps your floors looking their best.
Step 3: Clean The Brush Roll And Filter
How To Clean The Brush Roll And Filter Of The Shark Robot Vacuum In A Simple And Time-Efficient Manner
Keeping the brush roll and filter of your shark robot vacuum clean and free from accumulated dust and dirt is crucial. If either of these components gets clogged, it can result in reduced suction power and efficiency of the vacuum.
We’ll guide you through the process of cleaning the brush roll and filter of your shark robot vacuum.
Cleaning The Brush Roll
The brush roll is responsible for picking up debris and dirt from your floors. To keep it functioning at its best, here are a few steps to follow:
- Turn off the vacuum and unplug it from the power source.
- Flip your vacuum over to access the brush roll. You will need a screwdriver to remove the cover.
- Once the cover is removed, use scissors or a brush to carefully remove any tangled hair, debris, or dust trapped around the brush roll.
- Using a damp cloth or paper towel, wipe the brush roll to make sure it’s free from any remaining debris.
- Replace the cover and screw it securely.
Cleaning The Filter
The filter is responsible for capturing the dust and dirt particles as they are pulled into the vacuum. Over time, the filter will become clogged with these particles and will need to be cleaned. Here are the steps to follow:
- Turn off the vacuum and unplug it from the power source.
- Locate the filter. Refer to your user manual if you’re unsure where it is located.
- Remove the filter from the vacuum.
- Use a soft brush or gently tap the filter over a garbage can to remove any loose dirt or debris.
- Clean the filter by running it under cold water until clean. Do not use soap or any other cleaning agents.
- Allow the filter to air dry completely before replacing it back into the vacuum.
By following these simple steps, you can keep your shark robot vacuum functioning at its best and ensure that it provides you with reliable cleaning power whenever you need it without any issues.
Step 4: Clean Other Components
Maintaining and cleaning your shark robot vacuum is essential for its longevity and continued efficiency. After following steps 1 to 3, you may now move on to step 4: clean other components.
Detailed Explanation Of How To Clean Other Components
The wheels, sensors, and dustbin are crucial components of the shark robot vacuum. Here’s how you can clean them effectively:
- Wheels: The wheels require regular cleaning to ensure a smooth and uninterrupted movement of the vacuum. Follow these steps:
- Turn off the vacuum before cleaning the wheels.
- Remove any dirt or debris stuck on the wheels using a small brush or cloth.
- In case of stubborn grime, use a mild soap solution and a damp cloth to clean the wheels gently.
- Wipe the wheels dry before using the vacuum again.
- Sensors: The shark robot vacuum comes equipped with several sensors that detect obstacles and prevent collisions. Keep them clean with these steps:
- Gently wipe the sensors with a soft cloth to remove any dirt or debris that may obstruct sensors’ functionality.
- Avoid using water or cleaning solutions on the sensors to prevent any damage.
- Repeat as often as necessary to ensure proper functioning of the sensors.
- Dustbin: Emptying and cleaning the dustbin regularly is crucial to maintain the vacuum’s suction power. Follow these steps:
- Remove the dustbin from the vacuum and empty the contents into a trash can.
- Use a soft, dry cloth to wipe the dustbin’s interior gently.
- For thorough cleaning, you may also use mild soap and water with a soft brush.
- Dry the dustbin before reattaching it to the vacuum.
Description Of How These Components Work
The shark robot vacuum’s wheels enable it to move smoothly and efficiently across the floor. The sensors detect obstacles in its path and ensure that it navigates around them smoothly without bumping into furniture or walls. The dustbin collects dirt and debris during the cleaning process.
Cleaning and maintaining these components are crucial as they work together to provide an efficient cleaning experience.
Maintaining your shark robot vacuum’s components is essential to ensure its continued efficiency and effectiveness. By following these easy steps, you can keep your vacuum in tip-top shape for a long time.
Step 5: Reassemble And Test
Once you have cleaned all the parts of the shark robot vacuum, it is time to reassemble it. Here’s how:
How To Reassemble The Shark Robot Vacuum To Ensure That All Parts Have Been Correctly Assembled.
- Take the dustbin and reattach it to the vacuum’s base.
- Replace the filter, making sure it is properly aligned.
- Reattach the side brushes and ensure they are secured tightly.
- Attach the main brushroll and snap it into place.
- Reattach the top cover by snapping it back into place.
The Best Practices To Conduct In The Initial Testing Phase.
Before you start using the shark robot vacuum, run a test to ensure it is working correctly. Here are some things to keep in mind during the initial testing phase:
- Turn on the power button and check if the vacuum starts.
- Make sure all the parts are assembled correctly and no parts are loose.
- Run the vacuum for a few minutes to test its suction power.
- Ensure the vacuum moves smoothly on the floor, without any jerking or stopping.
- Check the battery life by letting it run for an extended period.
How To Maintain The Vacuum’S Performance.
To ensure that the shark robot vacuum performs optimally, follow these tips:
- Clean the dustbin and filter after every use.
- Check and clean the brushes regularly to prevent clogging.
- Use a brush to remove any hair or debris from the brushroll.
- Check the battery life periodically, and replace it if it doesn’t hold a charge.
- Store the vacuum in a cool and dry place.
Remember to take necessary precautions while cleaning and maintaining the shark robot vacuum. With these simple steps, you can keep your vacuum working optimally for a long time.
Frequently Asked Questions Of How To Clean Shark Robot Vacuum
How Often Should I Clean My Shark Robot Vacuum?
It is recommended to clean your shark robot vacuum after every use to maintain its performance.
How Do I Clean The Brush Roll Of My Shark Robot Vacuum?
To clean the brush roll of your shark robot vacuum, remove it from the vacuum and use scissors to cut away any tangled hair or debris.
Can I Wash The Filters Of My Shark Robot Vacuum?
Yes, the filters of your shark robot vacuum can be washed. Gently rinse them in water and let them dry completely before placing them back in the vacuum.
How Do I Clean The Dustbin Of My Shark Robot Vacuum?
To clean the dustbin of your shark robot vacuum, remove it from the vacuum, empty the contents, and wash it with warm soapy water. Let it dry completely before placing it back in the vacuum.
Why Is My Shark Robot Vacuum Not Picking Up Dirt?
Your shark robot vacuum may not be picking up dirt due to a clogged filter, brush roll, or suction inlet. Check and clean these areas to ensure optimal performance.
Conclusion
Regularly deep cleaning your Shark robot vacuum is essential to maintain its performance and extend its lifespan. By following our step-by-step guide, you can easily keep your home free from dust and dirt. Remember, a well-maintained robot vacuum is a reliable one. So, invest some time in this deep cleaning process, and your Shark robot vacuum will continue to be your trusty cleaning companion for years to come.